Classic Homemade Firm Gelatin Bites
↓ Jump to Recipe
Create classic, wobbly homemade gelatin bites with this simple and colorful recipe perfect for parties and snacks.
There is an undeniable charm to these bouncy, hand-held gelatin treats that instantly transports many of us back to simpler times. Whether they graced the table at a sunny neighborhood birthday bash or served as a playful reward after a long afternoon of playing outside, these vibrantly colored squares possess a distinct ability to spark genuine happiness. Their wobbly texture and bright appearance are hallmarks of mid-century American party culture, capturing a sense of whimsy that never truly goes out of style.
Preparing these firm treats at home is a remarkably straightforward endeavor that requires little more than basic pantry items and a bit of patience. While many modern desserts lean toward complexity, this classic preparation celebrates the beauty of simplicity. It is the kind of project that welcomes participation from little ones, offering a sensory experience that feels just as rewarding to create as it is to consume.
I find that the best recipes are those that bridge the gap between generations, and this particular method does exactly that with grace. By following a few fundamental principles, you can produce a batch of perfectly structured gelatin that holds its form beautifully, whether you opt for standard geometric cuts or get creative with whimsical shapes. Let us dive into the details of bringing this nostalgic favorite to your own dining table.
Table of Contents
The Science of the Perfect Wobble
The secret to a successful result lies in the concentration of the gelatin. By using less water than you would for a standard bowl of dessert, you create a concentrated structure that remains stable enough to be picked up by hand. This firmness is essential, as it allows the mixture to be sliced into intricate shapes without losing integrity or falling apart on the platter. It is a balancing act of physics, where the ratio of powder to liquid determines the structural success of the final product.
Furthermore, temperature plays a critical role in the development of that signature snap. Starting with truly boiling water ensures that the gelatin proteins are fully hydrated and distributed evenly throughout the liquid. If the powder is not completely dissolved before the mixture begins to cool, you will end up with a grainy texture or soft spots that compromise the overall mouthfeel. Achieving a crystal-clear, smooth base is the mark of a well-executed batch.
Creative Customization and Presentation
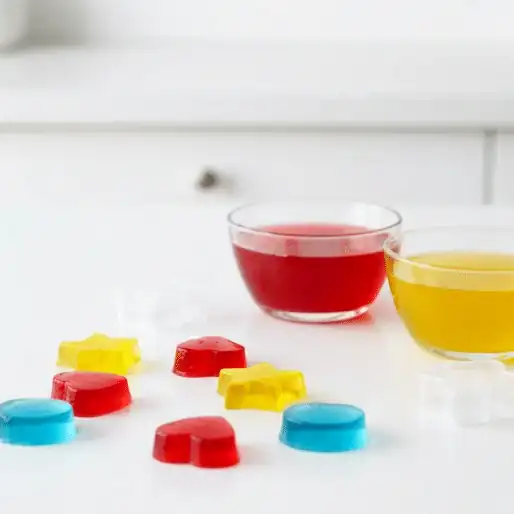
One of the most delightful aspects of this treat is the endless room for visual expression. While a simple square cut is always reliable and easy to manage, exploring different shapes can transform these bites into a thematic centerpiece. Using metal cookie cutters allows you to lean into the season, whether you are crafting hearts for a thoughtful occasion or stars for a festive gathering. The key to clean lines is ensuring that your tools are dry and occasionally warmed, which helps them glide through the set gelatin effortlessly.
Beyond the shape, consider how the color palette interacts with your serving vessel. Arranging a mosaic of different flavors on a crisp white platter creates a stunning visual display that feels intentional and elegant. If you want to elevate the presentation even further, consider the interplay of textures by serving these alongside a dollop of whipped cream or a side of fresh seasonal berries. The contrast between the firm, cool gelatin and soft, creamy toppings provides a sophisticated finish to a humble classic.
Ingredients You Will Need
Classic Homemade Firm Gelatin Bites
Create classic, wobbly homemade gelatin bites with this simple and colorful recipe perfect for parties and snacks.
Ingredients
Instructions
- Apply a thin, uniform layer of non-stick spray to the interior of your chosen baking pan.
- Empty the contents of both gelatin boxes into a medium-sized mixing bowl .
- Pour the boiling water directly over the gelatin powder.
- Whisk the mixture thoroughly until every grain of powder has completely melted into the liquid.
- Transfer the liquid into your greased baking dish , ensuring it reaches the corners evenly.
- Place the dish into the refrigerator and allow it to sit undisturbed for a minimum of 3 hours.
- Verify the firmness of the mixture before using a knife or sharp cookie cutters to slice it into your desired patterns.
- Carefully lift each piece from the pan and arrange them on a serving plate.