Classic Homemade Firm Gelatin Bites: Step-by-Step Instructions
Step-by-Step Instructions
- Apply a thin, uniform layer of non-stick spray to the interior of your chosen baking pan.
- Empty the contents of both gelatin boxes into a medium-sized mixing bowl.
- Pour the boiling water directly over the gelatin powder.
- Whisk the mixture thoroughly until every grain of powder has completely melted into the liquid.
- Transfer the liquid into your greased baking dish, ensuring it reaches the corners evenly.
- Place the dish into the refrigerator and allow it to sit undisturbed for a minimum of 3 hours.
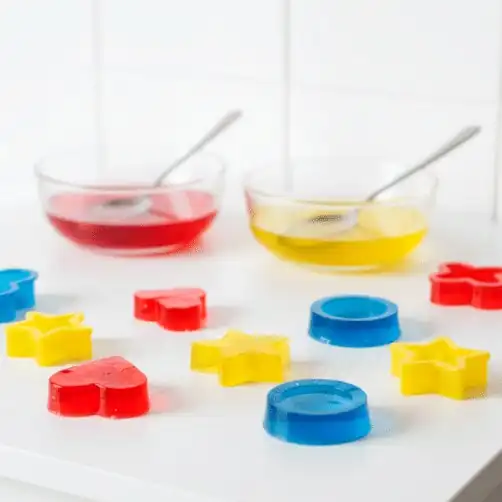
- Verify the firmness of the mixture before using a knife or sharp cookie cutters to slice it into your desired patterns.
- Carefully lift each piece from the pan and arrange them on a serving plate.
Essential Best Practices for Success
To ensure your kitchen project goes smoothly, preparation is paramount. Applying a light, even layer of non-stick spray to your baking dish is the most important step for a stress-free removal process. Even the most perfectly set batch can be difficult to manage if it clings to the bottom of the pan. A light coating acts as a barrier that allows your shapes to release cleanly, preserving those crisp, sharp edges that make the final result look so professional.
Patience is perhaps the most underrated ingredient in this entire process. While it is tempting to check the refrigerator frequently, allowing the mixture to firm up undisturbed for the full duration is necessary for structural stability. Attempting to cut into the gelatin before it has reached its full potential will lead to frustration, as it will stick to your tools and lose its structural firmness. Trust the process, let the refrigeration work its magic, and you will be rewarded with a product that stands up perfectly to any display.
Pro Tips for Success
- Ensure the gelatin powder is completely dissolved in the hot water to prevent a gritty texture.
- If you find the pieces are sticking, briefly run the bottom of the baking dish under warm water to loosen the base.
Easy Variations
- Layering different colors of gelatin involves letting one layer set partially before pouring a second color on top.
- Add small, thinly sliced fresh fruits inside the liquid before it sets for a pop of natural texture.
Storage and Make-Ahead
These treats stay fresh when stored in a sealed container within the refrigerator for up to 5 days. Keep them in a single layer if possible, or place sheets of parchment paper between tiers to prevent them from fusing together. Avoid leaving them out at room temperature for extended periods, as they will soften and lose their firm, bite-sized appeal.
Frequently Asked Questions
What is the secret to getting clean cuts every time?
The best approach is to ensure your gelatin is fully chilled and firm before you begin. Dipping your cookie cutters or knife into a bit of warm water just before slicing helps the tool glide through the gelatin without sticking.
Can I use different flavors in one batch?
Absolutely, using two different flavors can create an interesting visual contrast. You can alternate rows of color on the platter to provide variety for your guests, which is especially popular at parties.
Why does the recipe call for less water than a standard box?
The reduced water volume is critical for creating a firmer, more concentrated texture. This density allows the pieces to be handheld, whereas a standard ratio would result in a texture that requires a spoon.
Is it possible to speed up the setting process?
While you can place the pan in the freezer for about an hour, you must be careful not to let it freeze solid, which will ruin the texture. The refrigerator is the safest and most reliable way to achieve the correct consistency.
What should I do if my pieces stick to the bottom?
Properly greasing your pan is the most effective preventative measure. If you still have trouble, try sliding a thin, warm spatula underneath the gelatin to gently lift it away from the pan's surface.
Final Thoughts
Embracing this classic recipe is a wonderful way to bring a bit of joy and color to your kitchen routine. By focusing on simple techniques and quality ingredients, you can recreate a timeless dessert that never fails to delight. Whether you are revisiting a favorite memory or introducing someone new to the fun, these firm gelatin bites are always a welcome sight at any gathering. Enjoy the process of creating these colorful, wobbly treats and the smiles they are sure to generate.
Related recipes: Refreshing Strawberry Gelatin Salt Fusion, pink gelatin trick dragon fruit powder, Refreshing Natural Strawberry Gelatin Treat, Jello Recipe for Weight Loss, Pink Salt Gelatin Trick Recipe.
Learn more: Classic on Wikipedia · food storage & safety (FoodSafety.gov).
◆ ◆ ◆
← Back to Classic Homemade Firm Gelatin BitesGet new recipes
One tasty homemade recipe in your inbox each week. No spam, unsubscribe anytime.


Comments