Creamy Frozen Pudding Pops Classic Recipe: Step-by-Step Instructions
Step-by-Step Instructions
- Pour your chosen instant pudding mix into a medium-sized bowl.
- Add the evaporated milk to the bowl with the dry powder.
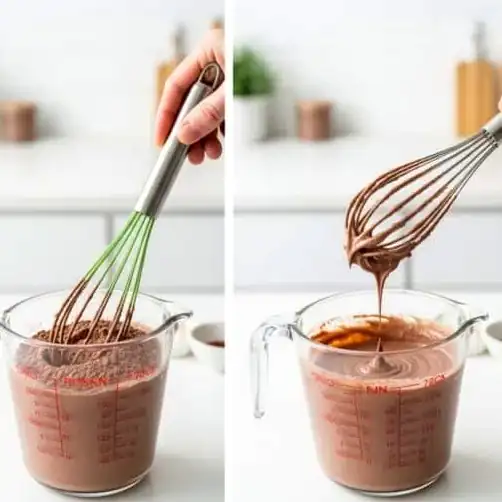
- Whisk the combination vigorously for two minutes until the texture is smooth and thick.
- Repeat the process in a separate bowl if you are creating multiple flavor batches.
- Lightly coat the interior of your popsicle molds with a thin layer of baking spray if desired.
- Spoon or pour the pudding mixture carefully into each mold cavity.
- Gently tap the molds against your kitchen counter to release any trapped air bubbles.
- Cover the tops of the molds with a secure lid or a piece of foil.
- Insert a wooden or reusable popsicle stick into the center of each cavity.
- Transfer the molds to the freezer and allow them to chill for at least six hours until firm.
Flavor Profiles and Customization
The versatility of instant pudding as a base cannot be overstated. While vanilla and chocolate are the gold standard, the landscape of flavors available today allows for endless experimentation. You might consider rotating different types of pudding depending on the season, such as leaning toward richer, darker cocoa profiles during colder months or lighter, brighter vanilla notes when the weather turns warm.
Beyond the base flavor, the addition of small inclusions can transform these from a snack into a gourmet dessert. Stirring in mini chips or fine crumbles can add textural contrast that elevates the experience. Just remember to keep your add-ins small so they do not interfere with the mold's structural integrity or make the pops difficult to remove once they are set.
Pro Tips for Success
- Use a piping bag to fill your molds if you want to avoid messy drips and ensure a clean, professional finish on your pops.
- If you find the pops are sticking too much during removal, run the outside of the mold under warm tap water for ten seconds, but be careful not to let the water touch the top of the pop itself.
Easy Variations
- Create a marble effect by pouring a small amount of chocolate pudding into the mold, followed by a bit of vanilla, and lightly dragging a skewer through the mixture before freezing.
- Fold in very small, finely chopped dark chocolate curls or shavings right before pouring to add a sophisticated crunch.
Storage and Make-Ahead
To maintain the best quality, store your finished pudding pops in an airtight container or wrap each one individually in cling film once they are fully frozen. This prevents freezer burn and keeps unwanted odors from migrating into the dairy mixture. They are best enjoyed within two months for optimal flavor and texture; avoid letting them thaw and refreeze, as this will compromise the creamy consistency.
Frequently Asked Questions
Is it possible to use non-dairy milk for this recipe?
You can use a non-dairy alternative, though it will significantly alter the final texture. A thicker, full-fat plant-based milk will yield better results than a thin or watery version.
Why does my pudding mixture look lumpy?
Lumps usually occur if the pudding powder was not whisked sufficiently into the liquid. Ensure you are using a sturdy wire whisk and working the mixture for the full two minutes to ensure total hydration.
Can I replace the evaporated milk with something else?
Evaporated milk is specifically chosen for its concentrated, creamy properties. While you can use whole milk, the resulting pop will be slightly less dense and have a lighter mouthfeel.
How do I ensure my sticks stay in the middle?
If you are using foil to cover the mold, poke the stick through a small slit in the foil; this acts as a support system to hold the stick perfectly upright while the mixture solidifies.
Are these suitable for a party?
They are excellent for gatherings. Because they are pre-portioned and easy to hold, they serve as a perfect, low-stress dessert that allows you to spend more time with your guests.
Final Thoughts
Mastering the art of the homemade frozen pudding pop is a rewarding endeavor that proves you do not need complex techniques to satisfy a craving for something sweet. By focusing on quality ingredients and proper freezing methods, you have all the tools necessary to produce a dessert that hits the mark every time. Enjoy the process and the inevitable joy that comes with serving these creamy, chilled favorites to those you love.
Related recipes: Refreshing Strawberry Gelatin Salt Fusion, pink gelatin trick dragon fruit powder, Refreshing Natural Strawberry Gelatin Treat, Jello Recipe for Weight Loss, Pink Salt Gelatin Trick Recipe.
Learn more: Pudding on Wikipedia · food storage & safety (FoodSafety.gov).
◆ ◆ ◆
← Back to Creamy Frozen Pudding Pops Classic RecipeGet new recipes
One tasty homemade recipe in your inbox each week. No spam, unsubscribe anytime.


Comments