DIY Custom Edible Gelatin Sequins Guide
↓ Jump to Recipe
Learn to craft beautiful, edible gelatin sequins for your cakes with this simple guide. Elevate your desserts with these stunning homemade gems.
Stepping into the kitchen to craft decorations by hand brings a level of satisfaction that store-bought items simply cannot replicate. Among the various ways to embellish a professional-looking dessert, creating your own translucent, glistening accents is perhaps the most rewarding. These delicate, candy-like discs catch the light beautifully, transforming an ordinary frosted cake into a centerpiece worthy of a celebration.
If you have ever stared at a bakery window and wondered how those shimmering, jewel-toned shapes were crafted, you have likely encountered the magic of handmade gelatin sequins. These are not your typical crunchy sprinkles or dull sugar shapes. Instead, they offer a sophisticated, modern appearance that feels both nostalgic and entirely fresh. They are essentially thin, set sheets of flavored or neutral gelatin cut into precise, decorative forms.
Making these is a quiet, meditative process that allows you to play with your favorite color palettes and geometric designs. By controlling the depth of hue and the variety of shapes, you are essentially painting with food. Whether you are prepping for a birthday, a holiday gathering, or an intimate dinner party, these little accents provide the perfect finishing touch to express your creativity.
Table of Contents
Why This Decorating Technique Shines
What makes these decorations stand out is their unique ability to blend seamlessly with any dessert surface. Unlike heavy fondant or hard candy pearls that can feel cumbersome or overly sugary, these thin gelatin pieces are lightweight and practically dissolve upon consumption. Their subtle shine adds a layer of depth that creates a professional finish, making them ideal for high-end patisserie styling.
Beyond their aesthetic appeal, the process itself is a masterclass in simplicity. You do not need expensive equipment or specialized culinary training to achieve results that look like they came from an artisan shop. The ability to customize every batch ensures that your decorations match your party theme exactly, whether you are aiming for muted pastels or deep, saturated primary colors.
Mastering the Craft of Custom Shapes
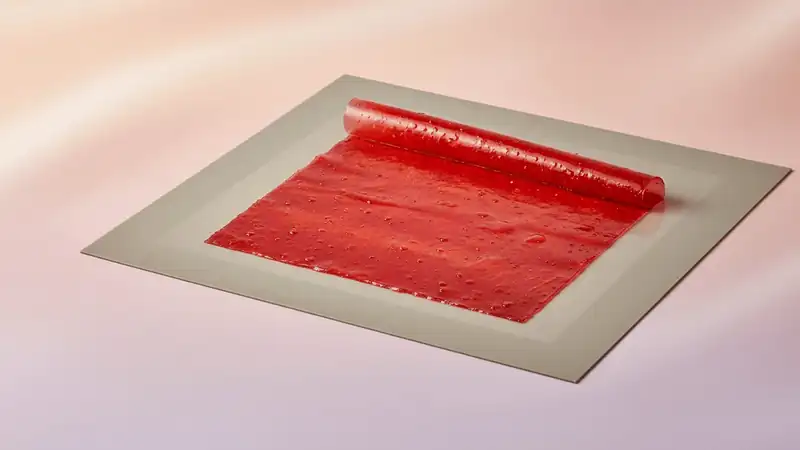
The secret to a successful batch lies in the consistency of the gelatin sheet. Achieving the right thickness is vital; you want them sturdy enough to handle but thin enough to look delicate. By using parchment paper as a canvas, you ensure a clean release once the mixture has fully set. Experimenting with different cutters—or even simple household items like straws—allows for a variety of textures and sizes.
Think of this as an artist's project where the kitchen table serves as your studio. Patience is the most important element, as rushing the drying time will lead to sticky, difficult-to-manage pieces. By allowing the sheet to set properly at room temperature, you develop the structural integrity required to create crisp, clean edges when you finally move to the cutting phase.
Ingredients You Will Need
DIY Custom Edible Gelatin Sequins Guide
Learn to craft beautiful, edible gelatin sequins for your cakes with this simple guide. Elevate your desserts with these stunning homemade gems.
Ingredients
Instructions
- Combine the cold water and unflavored gelatin in a small, heatproof vessel.
- Allow the mixture to sit undisturbed for five minutes so it can fully hydrate.
- Pour the boiling water over the gelatin and stir steadily until the mixture is clear and fully dissolved.
- Incorporate your chosen food coloring gel in small amounts until you achieve the desired intensity.
- Stir in the optional corn syrup if you prefer a higher degree of luster.
- Pour the liquid mixture onto a parchment-lined rimmed baking sheet.
- Tilt the sheet gently to ensure an even, thin coating across the surface.
- Let the mixture stand at room temperature for at least four to six hours until firm.
- Use small cookie cutters or a sharp blade to create your preferred shapes from the set sheet.
- Carefully lift the finished shapes from the parchment using clean, dry fingers.
- Transfer the finished pieces into an airtight container for future use.