DIY Custom Edible Gelatin Sequins Guide: Step-by-Step Instructions
Step-by-Step Instructions
- Combine the cold water and unflavored gelatin in a small, heatproof vessel.
- Allow the mixture to sit undisturbed for five minutes so it can fully hydrate.
- Pour the boiling water over the gelatin and stir steadily until the mixture is clear and fully dissolved.
- Incorporate your chosen food coloring gel in small amounts until you achieve the desired intensity.
- Stir in the optional corn syrup if you prefer a higher degree of luster.
- Pour the liquid mixture onto a parchment-lined rimmed baking sheet.
- Tilt the sheet gently to ensure an even, thin coating across the surface.
- Let the mixture stand at room temperature for at least four to six hours until firm.
- Use small cookie cutters or a sharp blade to create your preferred shapes from the set sheet.
- Carefully lift the finished shapes from the parchment using clean, dry fingers.
- Transfer the finished pieces into an airtight container for future use.
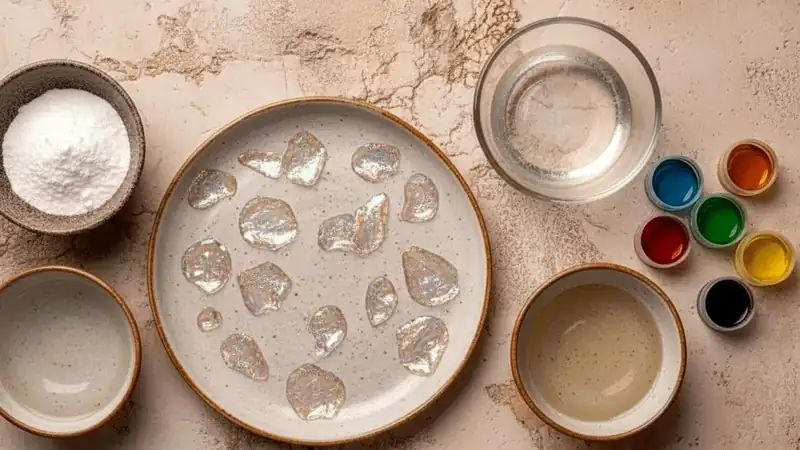
Creative Applications for Your Creations
Once you have successfully produced a jar of these shimmering accents, the ways to use them are endless. I find they look particularly striking when layered over smooth buttercream, where the contrast between the matte frosting and the glossy gelatin creates a tactile experience. You can create patterns, gradients, or an organic, scattered look that mimics falling confetti.
For those who enjoy hosting, these are a fantastic way to elevate individual desserts like tarts or mousse cups. Placing a few stars or circles atop a whipped topping adds an immediate sense of occasion. Because they are so lightweight, they remain in place perfectly, staying crisp and vibrant until the very moment your guests are ready to indulge.
Pro Tips for Success
- Use a toothpick to introduce color in tiny increments, as this prevents over-darkening and gives you better control over the final shade.
- If you lack small cutters, a simple drinking straw is an excellent tool for punching out uniform, tiny circles that look professional on any cake.
Easy Variations
- For a natural color palette, try replacing synthetic dyes with concentrated botanical powders like beet or spirulina, whisking them thoroughly into the hot water.
- If you prefer a vegetarian approach, experiment with agar-agar, though note that it creates a slightly different, more brittle texture than traditional gelatin.
Storage and Make-Ahead
Keep your finished pieces in a clean, airtight container stored in a cool, dry area away from direct sunlight. It is helpful to place a small sheet of parchment paper between layers to prevent sticking. Avoid the refrigerator, as excess humidity will soften the texture and compromise the shiny finish. When stored correctly, they will remain in excellent condition for several weeks.
Frequently Asked Questions
Can these be placed on top of warm desserts?
No, you must avoid applying them to anything warm. High heat will cause the gelatin to melt, ruining your hard work.
What is the best way to ensure they have a high shine?
The optional addition of a small amount of corn syrup is the secret to a professional, glossy finish. Additionally, ensuring the surface is perfectly flat while setting helps light reflect evenly.
Do these have a strong flavor?
Because they are made from unflavored gelatin, they are essentially neutral. They will take on a very subtle sweetness from the corn syrup, but they are designed to be an aesthetic enhancement rather than a dominant flavor component.
How can I tell if the gelatin has set long enough?
The sheet should feel dry and firm to the touch without any tackiness. If you press your finger against the surface and it leaves a mark or feels sticky, give it more time to dry.
Are these safe for children to eat?
Yes, they are made from food-grade ingredients and are perfectly safe for consumption. They are small and dissolve quickly, making them suitable for most decorated treats.
Final Thoughts
Mastering the art of making these edible accents is a wonderful skill to add to your baking repertoire. It turns the simple act of decorating into a creative outlet, allowing you to personalize every dessert you serve. With a little patience and a handful of basic ingredients, you can transform your kitchen into a miniature studio, producing beautiful, shimmering details that leave a lasting impression on your guests.
Related recipes: Jello Pudding Pops Recipe, Simple Low-Carb Gelatin Dessert Delight, jelly lean gelatin recipe, Gelatin Trick Chamomile Sleep Recipe, Easy 3 Ingredient Gelatin Trick Recipe for Weight Loss.
Learn more: Gelatin on Wikipedia · food storage & safety (FoodSafety.gov).
◆ ◆ ◆
← Back to DIY Custom Edible Gelatin Sequins GuideGet new recipes
One tasty homemade recipe in your inbox each week. No spam, unsubscribe anytime.


Comments