Mastering the Art of Homemade Clear Gelatin: Step-by-Step Instructions
Step-by-Step Instructions
- Distribute the gelatin powder evenly over the cold water in a small mixing bowl.
- Allow the mixture to sit undisturbed for five minutes until it becomes spongy.
- Pour the boiling water into the bowl containing the gelatin.
- Stir the liquid gently until the gelatin has dissolved completely.
- Mix in the sugar if you prefer a sweet version.
- Stir in the vanilla extract or lemon juice if you desire extra flavor.
- Wet the inside of your mold with water to facilitate easy removal.
- Pour the mixture into your chosen dish and skim off any bubbles from the surface.
- Refrigerate the mold for at least four hours until it is firm.
- Dip the bottom of the mold into warm water for a few seconds to loosen the edges.
- Invert the mold onto a serving plate to release the gelatin.
Customization and Presentation
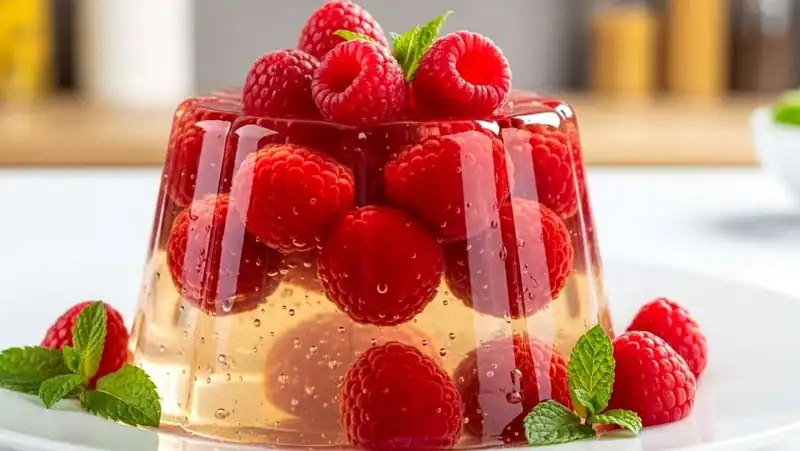
Once you are comfortable with the base, the possibilities for customization are vast. This recipe is designed to be a starting point. You can swap out plain water for strained fruit juices to add a subtle tint and flavor, or incorporate herbs like mint or basil for a sophisticated, adult-forward profile. Because the setting agent is neutral, it works just as well in a savory context as it does in a sweet one, making it a truly multi-purpose element for your repertoire.
Consider the serving vessel as a key component of your final design. Using a vintage mold can provide a classic, decorative shape, while a simple glass dish creates a clean, modern aesthetic. Always remember to lightly wet the container before adding your mixture; this small detail acts as a release agent. When it is time to serve, a brief dip in warm water allows the masterpiece to slide out with ease, leaving you with a polished, professional dessert.
Pro Tips for Success
- To achieve maximum clarity, ensure the water reaches a full boil before adding it to the gelatin, and avoid aggressive whisking that might trap air.
- If you want to create a suspended effect with fruit, chill the liquid until it is slightly thickened but not fully set before adding your fruit pieces to keep them from floating to the surface.
Easy Variations
- Substitute a portion of the boiling water with chilled apple juice or white grape juice to create a naturally tinted, flavored base.
- Infuse the boiling water with fresh herbs or citrus peels for five minutes, then strain before mixing to add a subtle, aromatic depth.
Storage and Make-Ahead
The best way to keep your finished gelatin is to cover it tightly with plastic wrap and store it in the coldest part of your refrigerator. It will maintain its texture for up to four days. Be aware that if you have embedded fresh fruits with high water content inside, the texture may soften slightly over time, so it is best enjoyed within the first two days of preparation.
Frequently Asked Questions
Why is it necessary to let the gelatin bloom?
Blooming allows the protein particles to hydrate evenly in cold liquid. This prevents the formation of clumps that would otherwise be impossible to dissolve later.
Can I speed up the setting process in the freezer?
It is not recommended to use the freezer, as it can cause the gelatin to develop ice crystals and lose its smooth, delicate mouthfeel. Patience is necessary for the best results.
What should I do if my gelatin remains cloudy?
Cloudiness usually indicates that the gelatin did not dissolve fully or that too many air bubbles were incorporated during the mixing process. Ensure the water is truly boiling and stir very slowly.
Is it possible to use this in a savory dish?
Yes, this recipe works beautifully for savory applications. Simply omit the sugar and flavorings, and perhaps incorporate a clear chicken broth in place of some of the water.
How do I ensure it comes out of the mold perfectly?
The secret is the light coating of water inside the mold before pouring. Additionally, a very brief dip in warm water just before serving will create a thin melting layer that helps it release.
Final Thoughts
Mastering this recipe is truly about returning to the fundamentals of the kitchen. By focusing on simple components and refined techniques, you are capable of producing a dessert that is as beautiful to look at as it is to eat. Take the time to enjoy the process of turning water and gelatin into a crystalline delight. Once you have perfected the basics, you will find it is a skill that serves you time and again for various occasions.
Related recipes: Refreshing Strawberry Gelatin Salt Fusion, pink gelatin trick dragon fruit powder, Refreshing Natural Strawberry Gelatin Treat, Jello Recipe for Weight Loss, Pink Salt Gelatin Trick Recipe.
Learn more: Mastering on Wikipedia · food storage & safety (FoodSafety.gov).
◆ ◆ ◆
← Back to Mastering the Art of Homemade Clear GelatinGet new recipes
One tasty homemade recipe in your inbox each week. No spam, unsubscribe anytime.


Comments