Mastering the Essential Gelatin Trick Recipe: Step-by-Step Instructions
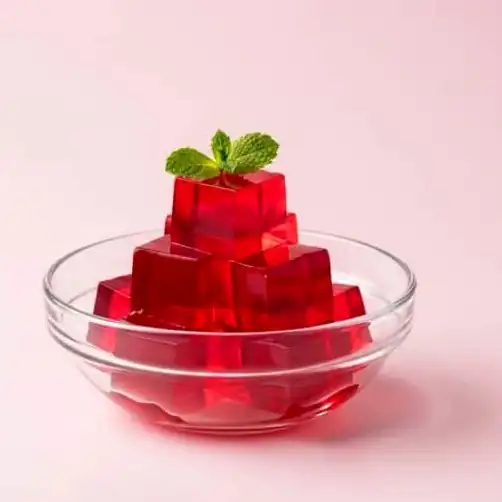
Precision in the Kitchen
Success with this medium relies heavily on patience. After you have combined your liquids and poured them into your chosen vessels, the cooling period is where the true structure is built. Rushing this process by trying to accelerate the chill in the freezer can often lead to uneven textures or condensation that compromises the surface.
Equally important is the quality of your vessels. Whether you are using intricate silicone molds for professional-looking shapes or simple glass containers for easy cubing, ensuring they are clean and lightly oiled will save you significant frustration during the unmolding phase. Small preparations yield substantial rewards in the final presentation.
Pro Tips for Success
- Always prioritize the blooming step to ensure the gelatin dissolves into a completely smooth, clump-free liquid.
- Apply a very thin layer of neutral cooking spray to your molds before pouring; this ensures your finished shapes release without tearing.
Easy Variations
- Fold in small, bite-sized pieces of fresh berries or citrus segments just before the mixture begins to set for a textured experience.
- Substitute the water with a flavorful juice or a creamy nut-based milk to change both the color and the opacity of the final dessert.
Storage and Make-Ahead
To maintain the best texture, keep your prepared gelatin in a sealed container within the refrigerator. It will stay fresh and firm for up to five days. It is important to avoid placing the container in the freezer, as the crystal structure will be damaged by freezing temperatures, leading to a watery, unpleasant separation once thawed.
Frequently Asked Questions
What is the primary role of the cooling period?
The cooling period allows the protein chains to organize and solidify, which creates the firm structure you expect. Without sufficient time, the bonds will not hold, resulting in a product that is soft or runny.
Can I use boiling water directly on the dry powder?
It is not recommended, as the hot water can cause the outer layer of the powder to swell instantly, creating a barrier that prevents the inside from dissolving. Blooming with cold water first is the only way to ensure a uniform texture.
What alternatives exist if I need a firm set for a warm environment?
If you require a higher melting point, you might consider blending your gelatin with plant-derived thickeners like agar-agar. Note that this will change the mouthfeel, as the texture becomes slightly more brittle.
Why is my gelatin cloudy after it has set?
Cloudiness is typically the result of incomplete dissolution during the mixing stage or by stirring too vigorously, which introduces air bubbles. Ensure you stir slowly and thoroughly until the liquid is entirely transparent.
Does the type of mold matter for the final release?
Flexible silicone molds are generally superior for intricate shapes because they allow you to peel the mold away from the set mixture. Rigid plastic or metal pans are better suited for simple cubes that can be cut with a sharp, warm blade.
Final Thoughts
Mastering this versatile base is a cornerstone skill for any creative cook. By understanding the balance of hydration and temperature, you gain the ability to craft everything from simple, refreshing snacks to complex, molded centerpieces. Enjoy the process of experimentation and the satisfaction that comes with creating something perfectly structured and delightful to serve.
Related recipes: Refreshing Strawberry Gelatin Salt Fusion, pink gelatin trick dragon fruit powder, Refreshing Natural Strawberry Gelatin Treat, Jello Recipe for Weight Loss, Pink Salt Gelatin Trick Recipe.
Learn more: Mastering on Wikipedia · food storage & safety (FoodSafety.gov).
◆ ◆ ◆
← Back to Mastering the Essential Gelatin Trick RecipeGet new recipes
One tasty homemade recipe in your inbox each week. No spam, unsubscribe anytime.




Comments