Velvety Whipped Yogurt Cheesecake Delight
↓ Jump to Recipe
Discover this airy, tangy Japanese-inspired no-bake cheesecake. A simple, refreshing dessert that balances creaminess with a delightful light finish.
There is a unique joy in finding a dessert that feels luxurious yet remains remarkably approachable. If you have ever been intimidated by the finicky water baths or precise timing required for traditional cheesecakes, this cooling variation will be a welcome addition to your repertoire. It trades heavy density for a cloud-like consistency that melts effortlessly on the tongue, providing a sophisticated treat that feels just right for any occasion.
What draws many to this specific style of cheesecake is the deliberate use of Greek yogurt, which provides a bright, acidic edge that cuts through the richness of the dairy. It is a harmonious balance of flavors, leaning into a profile that is far less cloying than the standard American bakery variety. This is not about cutting corners, but rather about embracing a different school of thought where aeration and tanginess take center stage.
As we navigate our busy lives, having a reliable recipe that comes together without turning on the oven is a genuine victory. Whether you are hosting a small gathering or simply looking to treat yourself to something elegant on a Tuesday evening, this chilled delight offers a reliable path to satisfaction. It is a celebration of simplicity, relying on quality components to create a final product that looks and tastes like a labor of love.
Table of Contents
The Art of the Chill
The secret to the success of this dessert lies in its patient resting time. By allowing the mixture to settle in the refrigerator, we enable the structural components—specifically the cornstarch and the proteins within the yogurt—to firm up into a stable yet delicate structure. It is a slow transformation that happens behind the scenes, resulting in that iconic texture that wobbles just enough to signal its perfect consistency.
Because we are bypassing the oven entirely, temperature control during the initial mixing phase is vital. Ensuring your base elements are at the correct stage before they combine prevents the dreaded graininess that can occur when cold fats meet warm additives. This is a practice in patience, but one that rewards the home baker with a professional-looking dessert that stands tall on the serving plate every single time.
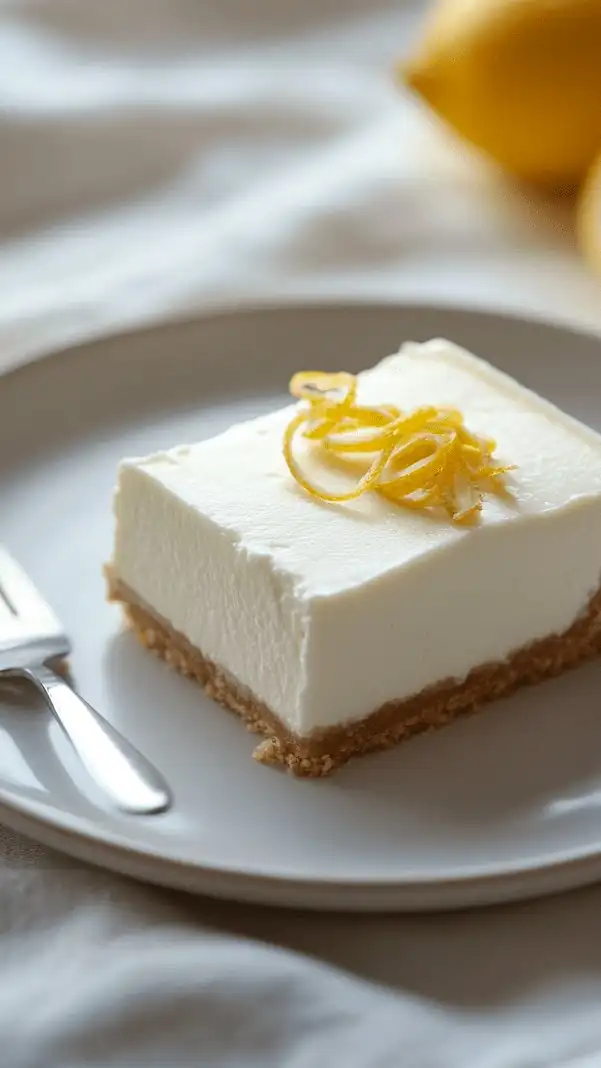
Balancing Richness and Refreshment
This recipe sits at an interesting intersection of decadence and lightness. By utilizing the fat content of cream cheese, we achieve the mouthfeel that cheesecake lovers expect, but the introduction of strained Greek yogurt lightens the profile significantly. It is an exercise in contrast, where the sharpness of lemon juice acts as a necessary bridge between the creamy fats and the sweetness of the sugar.
For those who appreciate the tactile experience of a dessert, the crumb topping provides that essential crunch. By using pulverized graham crackers, we create a textural playground. The contrast between the velvety center and the coarse, sandy topping elevates each bite, ensuring that the palate remains engaged from the first forkful to the last.
Ingredients You Will Need
- One cup (240ml) of full-fat Greek yogurt
- Eight ounces (226g) of softened cream cheese
- One-half cup (100g) of granulated sugar
- One-quarter cup (30g) of cornstarch
- Two large eggs
- One teaspoon of lemon juice
- Four ounces (113g) of graham crackers
Step-by-Step Instructions
- Reduce the graham crackers into a fine, uniform crumb using a food processor or a sealed bag with a heavy rolling pin.
- Place the softened cream cheese into a spacious mixing bowl and whip until it reaches a perfectly creamy and smooth consistency.
- Incorporate the sugar into the cream cheese gradually, continuing to beat the mixture until the grains are fully integrated and the texture is uniform.
- Combine the Greek yogurt, cornstarch, and lemon juice in a separate vessel, whisking thoroughly to ensure no lumps remain.
- Fold the yogurt mixture into the cream cheese base, beating only until they are just combined to maintain the desired airiness.
- Incorporate the eggs individually, ensuring each is fully beaten into the batter before adding the next, being careful not to overwork the mixture.
- Transfer the prepared batter into a six-inch or seven-inch springform pan that has been lined at the base with parchment paper.
- Distribute the graham cracker crumbs across the surface of the batter in an even layer.
- Shield the pan with plastic wrap and move it to the refrigerator for a minimum of two hours, though an overnight stay provides the best results.
- Loosen the edges of the cheesecake by running a thin-bladed knife around the perimeter before releasing it from the springform pan.
- Divide the cheesecake into slices and present it while it remains chilled.
Velvety Whipped Yogurt Cheesecake Delight
Discover this airy, tangy Japanese-inspired no-bake cheesecake. A simple, refreshing dessert that balances creaminess with a delightful light finish.
Ingredients
Instructions
- Reduce the graham crackers into a fine, uniform crumb using a food processor or a sealed bag with a heavy rolling pin .
- Place the softened cream cheese into a spacious mixing bowl and whip until it reaches a perfectly creamy and smooth consistency.
- Incorporate the sugar into the cream cheese gradually, continuing to beat the mixture until the grains are fully integrated and the texture is uniform.
- Combine the Greek yogurt, cornstarch, and lemon juice in a separate vessel, whisking thoroughly to ensure no lumps remain.
- Fold the yogurt mixture into the cream cheese base, beating only until they are just combined to maintain the desired airiness.
- Incorporate the eggs individually, ensuring each is fully beaten into the batter before adding the next, being careful not to overwork the mixture.
- Transfer the prepared batter into a six-inch or seven-inch springform pan that has been lined at the base with parchment paper .
- Distribute the graham cracker crumbs across the surface of the batter in an even layer.
- Shield the pan with plastic wrap and move it to the refrigerator for a minimum of two hours, though an overnight stay provides the best results.
- Loosen the edges of the cheesecake by running a thin-bladed knife around the perimeter before releasing it from the springform pan.
- Divide the cheesecake into slices and present it while it remains chilled.